I have too many hobbies (the great unfuckening)

I am getting a new loom in a month or so. It’s a Saori WX60, which is pretty small for a floor loom, but it still required I tidy my craft room to make space to use it in there, as over the winter it had become a dumping ground for xmas presents, clothes, and empty boxes. I managed to get a bag of rubbish, a bag of recycling, and a box of stuff to donate out of there, but it’s still pretty packed full, and I can’t really get rid of anything else because I love all my stuff! I just have too many hobbies. So I thought I’d give you all a quick tour of the room while it’s mostly tidy (but still uncleaned, the vacuum cleaner is rather heavy to carry upstairs, so please ignore the messy floor and the cobwebs).

Firstly this is what you see as you enter the room. Shelves stuffed full with fabric. These will be cleared and all the fabric folded, but it’s a rather long task, so it can wait for a while. There’s a mix of clothing fabric, quilting fabric, old sweaters and shirts to reclaim, and a few bits of handwoven stuff I’ve not found a use for yet. And an interested littlecat.

P1070977

Actually inside the room. Ahhh, much less messy.

P1070980

And working around the room in a clockwise direction: Dressing table area –

P1070985

1. Passap knitting machine. It’s awesome, but takes up a lot of space, so it’s currently disassembled
2. Knitting needles, spindles, blocking wires, pens, and scissors
3. Bits for my current quilting WIPs
4. My desk ‘inbox’ of stuff i need to deal with. Has a jumper in that needs frogging, some pegs from a peg loom, and some mini skeins of sock yarn.
5. random bits and bobs. Lint roller, lens caps, lighting gels sample books.
6. Plastic bags for putting spinning fibre in
7. Zips and small bits of fabric for making doll clothes
8. Sewing things. Threads, feet for the machine, scissors, chalk, rotary cutter etc
9. Blocking mats

Above the dressing table:

P1070986

1. My dad’s old meccano set!
2. Old crappy loom
3. Doll boxes
4. A box of bags. That I don’t really need. But maybe one day I will!
5. The rest of my current quilting WIPs to go with the bits on the desk
6. A bag. With nothing in. But it has owls on.
7. A box of boxes! I culled my cardboard box collection somewhat, but kept a few cos they are useful for spindle WIPs, storing rolags, thrummed knitting WIPs, and probably other things
8. Coned yarn, mostly silk.

Drum carding shelves:

P1070987

1. Strauch drum carder. It is awesome
2. Bag of bags that I do actually use, small foldable project bags
3. Carder stuff, one box with accessories like batt pick, brush, and flick carder, one with angelina and nylon sparkles
4. Dyed merino
5. Stuff that isn’t merino, some dyed, some not, all ready to spin/card
6. More stuff that isn’t merino but in larger quantities, again all ready to spin/card.
7. Cutting mats and rulers

Top of bookcase:

P1070999

Coned yarn, mostly wool

Inside the bookcase:

P1070988

1. Wollmeise Molly
2. Sanguine Gryphon Bugga!
3. Wollmeise Lace
4. Wollmeise sock
5. Other sock yarns
6. Boooooks
7. More sock/lace yarns that aren’t in skeins
8. Ironing board and knitting machine table, that I don’t need for my current machine as it has a stand, but its a really useful narrow folding table.

P1070997

Even more books and mags at the bottom of the bookcase. Mostly handknitting, but a few machine knitting, weaving, spinning, dyeing, and a couple of random ones on other things like basketweaving and home brewing.

Under the table:

P1070989

Loom bag for my Ashford knitter’s loom containing spare heddles, lease sticks, warping post etc, and a huuuge bag of drumcarder waste and leftovers for making fun batts.

On the table:

P1070990

It’s clear! it’s a miracle! Just the sewing machine and a couple of pots of pins/bobbins etc. The table is older than I am, it was our dining table when I was a kid, then got relegated to craft table status, then eventually was given to me.

Yarn cubbies

P1070992

1. Knitting machine bits and bobs
2. Doll clothing and wig making stuff
3. Fibre that is washed but not ready to spin, wool and alpaca mostly
4. More fibre, including 4 colours of Jacob that I combed last year
5. A leather case that I bought at a jumble sale cos it was cool, but never use
6. Long term knitting WIPs that I’ve not worked on for a while
7. Acrylic and mystery (alpaca maybe?) yarn
8. Acrylic
9. Single balls and yarn i have no plans for
10. Sweater quantities
11. Undyed yarn. Sock, lace, and gansey yarn
12. Leftovers, mostly sock weight
13. More sweater quantities, but in various colours for fairisle/stripes
14. Handspun – large skeins
15. More sweater quantities, and a sheep
16. Handspun – samples, small skeins, and leftovers
17 & 18. Fibre, luxury and hand dyed.
19. Super awesome bright light, holding a felted scarf

Small shelves:

P1070993

1. Overlocker
2 & 3. ‘Inboxes’ where I put stuff that I bring into the room before I put it away, at the moment has my swift and ballwinder in, and some socks that need darning. Also used for new yarn that still needs entering into my ravelry stash.
4. Art supplies that haven’t made it to the art cupboard downstairs yet either because there’s no room, I’m too lazy, or I don’t want anyone using my stuff.
5. Iron
6. The only box of crap! random stuff that needs sorting out and putting away, old pens, cables etc
7. Spinning stuff. Bobbins, 2 sets of carders.
8. Spinning and weaving stuff. Standard and jumbo flyer for my wheel, and all this stuff that came with the crappy loom. Such cute mini shuttles!

P1070996

The reason I don’t want people to use my art supplies, they might mess up my colours!
P1070995

In the built in cupboard:

P1070994

1. Enormous cushion pad and bag of fibrefill
2. bag of really really old wips. In crappy yarn. That i will never finish or wear. I will throw them away one day.
3. Curtain fabric left over from my bedroom curtains
4. Tripods and light stands. And an easel
5. Yarn that I was going to destash but the post office is sooo far away and I never know when I’ll be well enough to drive there. So maybe I will weave it instead.
6. Random odd balls of yarn with no projects planned, but too nice to get rid of. I will use them eventually.
7. More photography stuff, lights and cables and reflectors and things.

And that is the tour of my craft room and all my things! There are also many other things not shown as they dont live in there. My knitters loom and a box of kitchen cotton live under my bed, my current knitting WIPs and my interchangeable needles live in my bedroom, my spinning wheel, wool combs and niddy noddy live in the dining room, and my dyepots, dyes and other related stuff live in the utility room. Oh and there are more raw fleeces than I can count in the garage/loft. SO MANY HOBBIES AND SO MUCH STUFFFFF. But I don’t think I’ve reached the point yet where my stash will last longer than I do.

Garden evolution

So yeah, I’m an awful blogger, I’ve done a million things and not blogged about any of them. So, in my usual style, here’s a quick round up of what’s changed in the garden this year.

My previous lodger was very anti-garden, he used to say that given the choice he would concrete over the lot, so it’s been so nice to have someone who can actually help me do things. All the manual labour in the following projects has been provided by J, but I did all the things that can be done while sitting down, the planning, planting of seeds, and the ‘supervising’!

First, we relocated the chickens. They’d turned their area to mud, so we moved them onto a clean area of lawn, planning to re-seed their bit. The plans changed somewhat as we went along, so the layout is different now, and we’ve still not moved them to their final place, but the garden is looking nicer now, and we have an extra small raised bed.

The area has gone from mud to being covered in grass and overrun by a giant pumpkin plant in just a few months.

P1010990
P1020001
P1020302
P1020912

Our major project has been a new greenhouse (shut up, we DO need 4 greenhouses!). I saw this one offered on freegle, and while it needed a lot of work, it was freeee, so we went and picked it up. It wouldn’t fit in the car, so we had to saw each panel into 3 and reattach at home, but it was totally worth it. We also managed to score some extra bits of glass on freegle to replace the ones which had been broken.

All it needs now is a bit more putty round a couple of the windows, one pane of glass adding to the door, and for me to design and build a vent. I have the timber for it, but I’m still procrastinating about the best way to do it that’ll let it open easily and still be watertight when it’s shut. I finished building the bench in there today and moved my Abutilon, chillis, and a grape vine in there. Hopefully it’ll be the least drafty of all the greenhouses once it’s finished, so I can keep my non-hardy things over there in winter, and maybe move the heater in there if it still gets too cold.

P1020164
P1020894
P1020918
P1020896
P1020900

The front bed which is home to my cherry tree had a makeover and was turned into an alpine/succulent bed. It’s filling out really nicely now, and I made a little succulent wall hanging to go above it.

P1020125
P1020903
P1020902
P1020366

I also got to see a sempervivium flower for the first time. Of course it was one of the ones in the wall hanging that decided to do it, so the flower went all curvy trying to get vertical, but it still looked pretty.

P1020541

We harvested lots of things, and even remembered to photograph a few, including my first ever honeyberries!

P1020529
P1020729
P1020748
P1020785
P1020807
P1020852

We are currently overrun with cucumbers and trying to give them away to everyone we know. But hardly any tomatoes yet, only a few cherry ones, the late winter has set everything back, and it’s not faaaair, I want my tomatoes now, they are doing SO well. There are also baby peppers and melons hiding under the mass of foliage in the greenhouse.
P1020904
P1020909
P1020910
P1020911
P1020907
P1020908

The pond was looking very unhappy earlier in the year, there’s a tree behind my garden which fills it with leaves every autumn. I had the gross job of pulling out piles of rotting leaf muck, and then I put in a water lily and some oxygenators, and the water is now clear, and the newts are very happy. This autumn I must remember to put a net over it.
P1020916

In unrelated news, I finally got a new car. I loved my old car, but the windows didn’t work, the locks didn’t work, and every MOT it needed more and more work. My parents are getting a new car and decided to give me their old one, but in the end they swapped their old one for something that was cheaper for me to run. The man at the dealership was unsure as to whether I’d be able to fit an 8ft length of timber in, which is clearly of prime importance, so I made sure to get some roof bars too. And now I have a cute little mazda 2 that has working windows! and actually locks! and has a CD player rather than a tape player! And, my absolute favourite thing: air conditioning!!!!! I looooove my car.

P1020917

And my final new thing, bought with a combination of birthday money and destash proceeds…a 20″ ashford knitter’s loom. I’ve only had it a few days, but I’ve managed to make a teatowel (best teatowel ever!) and a scarf. I was concerned that it was going to be too physically hard for me, and using it on the stand was very tiring and hurt my back, but I figured out a way that I can use it while sitting in bed, by propping up the end on a plastic box, and it’s much easier to use that way.

P1020922
P1020857
P1020919

Black olive bread recipe

The other day I made perhaps THE MOST AMAZING bread I’ve ever made. Unfortunately the recipe I started from was awful and made flour soup rather than dough, so I improvised a lot. I made it again today so I could write up the recipe for future awesomeness.

P1010821

Makes: 2 medium sized loaves, or 4 single (large) serving baguettes.

Ingredients:

575g strong white flour
1 7g sachet of yeast
2 tablespoons sugar
1 teaspoon salt
3 tablespoons oil leftover from jars of sundried tomatoes (if none available, use olive oil)
75g olives (approx 25), halved
350ml warm water (just above body temp)
Dash of olive oil
Handful of coarse cornmeal

Method:

(This is mostly written out in a way so my bf can understand it. You can of course knead the bread by hand or make other changes such as rising in the fridge overnight. Also, if you’re not my bf you won’t get killed in the face for making a mess. At least, not by me.)

1) Put all the ingredients into the large bowl for the mixer. Mix, using the dough hook, for 10 minutes, on speed setting number 2. The dough should be solid and slightly sticky, leaving the sides of the bowl mostly clean, but sticking if left to touch the surface for more than a second or so.

2) Turn out dough onto a floured surface. Put the dough hook into warm water to soak IMMEDIATELY so it’s easy to clean later. Use a little flour to rub off any dough that has stuck to the bowl and add it to the lump of dough, and knead a little so you can form it into a ball. Pour a dash of olive oil into the bowl and rub it around with your hand, making sure to get right to the top of the bowl to allow for growth as it rises. Put your ball of dough back into the bowl and turn it over a few times until it’s nicely coated in oil.

3) Cover with cling film and leave in the airing cupboard for an hour, or until doubled in size.

4) Turn dough out onto floured surface, and punch down, then form into loaves/batons. Squish the dough out into a rectangle, oriented lengthways in front of you. Fold the bottom 3rd up, then the top 3rd down, and pinch the seam closed. Turn over and squish with your hands until it looks like a pretty shape. If you want to be really posh you can use a very sharp knife to make slits in the top.

5) Put a silicone baking sheet onto a metal baking tray, and sprinkle a handful of cornmeal over the baking sheet. Place bread on top, and cover with oiled clingfilm (lay clingfilm on cabinet, pour a couple of teaspoons of olive oil on, rub in with your hand, then invert and place over the bread).

6) Preheat oven to 200C. Leave bread for 20 minutes or until it doubles in size again. Put it in the airing cupboard to do this if the kitchen is cold, otherwise it’ll be fine left out on the counter. If any olive oil drips off the cling film onto my clean sheets in the airing cupboard I will kill you in the face.

7) Once the oven is hot and the dough is risen, remove the clingfilm and put it in the oven on the top shelf. Chuck half a mug full of cold water onto the bottom of the oven and immediately close the door. The steam makes the crust extra nice and crusty while leaving the inside moist. Cook for 15-25 minutes depending on the size of loaves you made. The bread is ready when it has a fairly dark crust, and sounds hollow when you turn it upside down and tap it.

8) Put on wire cooling rack for as long as you can bear, then EAT ALL THE BREAD. Once it’s cool, wrap in a clean teatowel to stop it going stale.

P1010810
All the stuff in the bowl

P1010811
The mixer doing its job

P1010812
Dough ball ready to go into the airing cupboard

P1010813
After rising

P1010814
After making into loaves, ready to stand for a while before baking

P1010818
Out of the oven. The 3 on the left are ready to eat, the one on the right was cooked for 10 minutes, and is waiting to cool before being frozen, will attempt to finish cooking from frozen sometime to see if I can have fresh bread whenever I want with no effort.

New vivarium

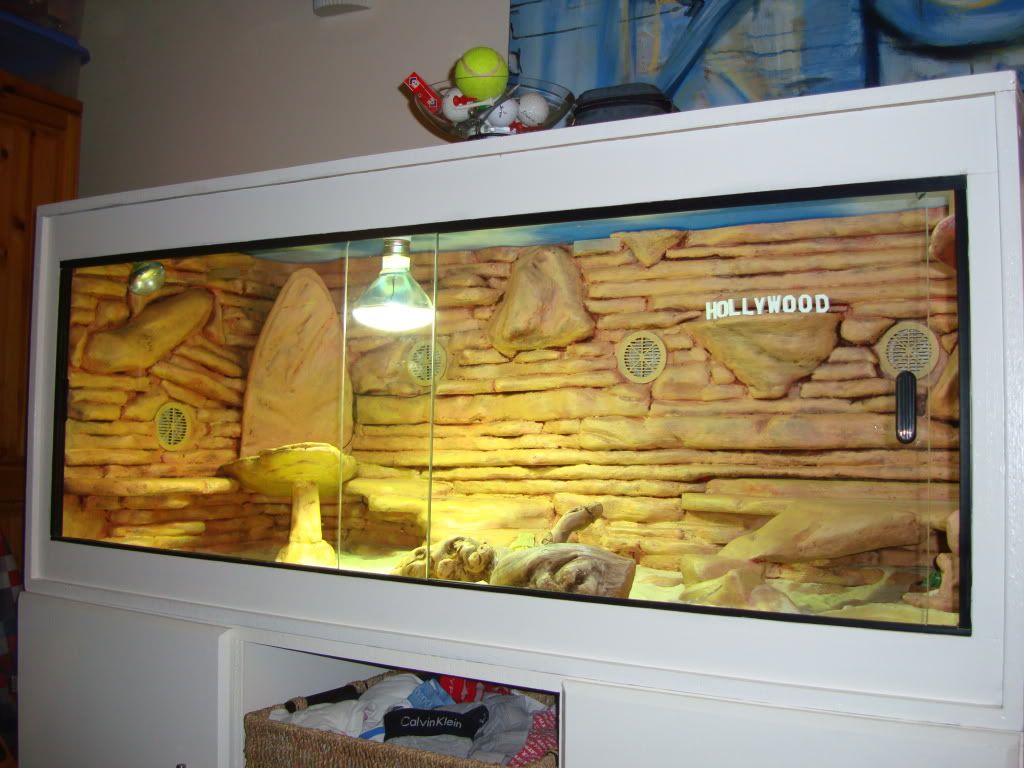
Currently all the babies (now 20! only one egg unhatched) are living in a small 2’6 vivarium. This is fine for them at the moment, means they don’t have far to go to get to their food/cool spot/basking spot. However when they are adults, they’ll need something bigger. Gren and I decided we’d look for a secondhand viv to house the two we are keeping, figuring we’d manage to get something within the next couple of months that was in our budget. As it was, I found this on ebay. 4ft viv with UV tube, ceramic heater, and 2 lightbulb fittings, and a cabinet to keep all the bits in (and raise it out of cats-eye-view) for £66.50. Score.

newviv

During my ebay hunting, I found this wonderful creation.

awesomeviv

If you have £279 burning a hole in your pocket, you can buy it here. However, with the £50+ it would take to get the UV and other light fittings, that was just sooo far out of our budget. But it’s so prettttty.

So I figured if that sort of thing is makeable, then goddamnit I can make it. I asked the internet how to make fake rocks for vivariums, and came up with all sorts of complicated stuff involving chicken wire and cement and soaking the end result in water for weeks to make the cement lizard-safe. And then thought ‘fuck that, I’d rather just make it out of polystyrene’. After a little more googling, it appeared that many people have done exactly that, including this awesome creation, which sadly I can’t credit as I can’t remember the forum I found the link on.

So I went to b&q, hoping to buy some of their small 25mm thick polystyrene sheets. However, the website lied to me, and they were out of stock of the small sheets, so I ended up buying a sheet that is 2.4m long and 1.2 metres wide. Awesome. The inside of my car however is smaller than 2.4×1.2m. So I had fun in the carpark breaking this enormous thing into 3 pieces that I could actually transport home.

I decided to put my skillz to the test and make a little climby basky thing the babies can use in their current viv to iron out any problems I have with the creation process before starting on the real thing. As I expected, while cutting this polystyrene with a stanley knife is easier than cutting the box I made the incubator out of, it’s still a pain in the ass, so I ordered a hot wire cutter to do the job much more neatly and easily. I also learned that b&q own brand PVA glue is a pile of crap. I dunno if I got a bad bottle or what, but the consistency was more like water than glue, even after vigorous shaking and stirring. So I cut my shapes out, used a combination of the crappy glue and cocktail sticks to hold the whole thing together, then covered with a layer of grout, then another later in the evening when that had dried, and I’ve just started on painting it, using acrylic paints, the plan being to use lighter shades of grey for each coat.

It clearly looks like rock, as the intelligent auto function on my camera decided it was a landscape!

After grouting
P1000712

After a coat of black paint
P1000716

first grey coat
P1000720

Total cost of this insane project so far:

Vivarium: £66.50
Polystyrene sheet: £6.98
Crappy glue: £3.50
Paintbrushes for grout: £3
Grout: £0 (the builders left a huge bag behind when they did my kitchen, woohoo!)
Hot wire cutter: £15.19
Paint: £7.34
Mirrors: £3.97
Total: £106.48

I’ll need to buy something to seal it with, either varnish or resin, I’ve not decided, and I may well need to buy more paint, and I’d like a circular thermometer I can incorporate into my planned design, but I think all the other bits I’m thinking of I can either make from the polystyrene or can salvage from things I already have, so fingers crossed it won’t cost me too much more.

So far my only ‘plans’ for the design are drawn really badly in a sketchbook, so you’ll just have to wait and see how it turns out and hope I remember to blog about it while it’s still a WIP.

Babies!

I think I probably forgot to blog about it, but these guys are J’s bearded dragons. He’s had Dizzy for a few years, and in spring decided to get a male to keep her company.

lizardlove

After a couple of months in separate vivs, and a bit of territorial behaviour, they decided to become friends and live together happily, then after a couple of weeks of mating behaviour…arm waving, head bobbing, beard biting, we realised dizzy was finally knocked up! We didn’t see the actual penetration the first time, but she was getting fatter and fatter. Then she started frantically digging in the sand in her viv. We took her out and put her in a box of damp compost, but she wasn’t very interested in it. After a couple of days of spending an hour in the compost box a day, she decided she was ready, dug a hole, and laid 21 eggs in it. We carefully extracted the eggs and put them in an incubator which I made from a polystyrene box with a heat mat attached to a thermostat in. Later I put a perspex window in and sealed it with silicone so I could see the eggs without lifting the lid. I put a dish of water in the box on the heat mat to get the humidity up (image below shows a small heat mat, we changed it to a larger one a few days in), and put the eggs in dents on the surface of damp vermiculite. Half the eggs we put on the surface in the orientation in which they were laid, and the other half we candled and put with the yolk sac up, as the internet disagreed on which method was best. Both worked fine for us. The crappy hygrometer we had measured the humidity between 80 and 90%, and we set the thermostat to 28 degrees C. None of the eggs showed any signs of mould, but they didn’t really seem to do much either, then after a few weeks we realised they were getting bigger.

inc

After 71 days, one of the eggs looked dented, but the others looked fine. We expected them all to dent shortly before hatching, but nope, just this one. On the morning of day 72 there was one baby hatched, and 3 more eggs pipped.

eggshatching

firstbaby

Now there are 14 babies! And they are so cute!

lizardpile

And in other news we harvested a lot of stuff from the plot. Potatoes, red onion, garlic, carrots, beans, peas, courgette and one squash

harvest

New bathroom, woo!

I’ve posted a pic of my bathroom here before. It’s generally relatively clean, but has a nasty ‘champagne’ coloured suite with gold coloured taps and beige tiles, and had a really nasty pink carpet. SERIOUSLY WHO THE FUCK PUTS CARPET IN A BATHROOM. And the paint was getting a bit peely and it just looked a bit crappy. Oh, and the shower leaked due to a really bad design of a bath with a raised lip at the shower end, so any water that went down the tiles at the back couldn’t go into the bath and ended up on the floor, and soaked through the FUCKING STUPID CARPET and started to weaken the board below. And the shower curtain was manky and mildewy and it was textured so it was really hard to get clean.

Here’s what it used to look like:

oldbathroomlabelled

Sadly a new suite and tiles were way outside my budget (and my DIY capabilities), but I knew I really needed to do something about the damaged floor board and peeling paint.

I was wandering around primark a couple of weeks ago waiting for bf to get off work, and I spotted shower curtains for £5. Not the most awesome pretty shower curtains I’d been dreaming of, but £5. So I got one. And then that motivated me to do everything else. I got some paint in a blue that would go with the shower curtain and not look terrible with the beige tiles and 5 different shades of wood, and found a cheap but good quality vinyl flooring remnant on ebay. I painted everything, then began the scary task of taking up the carpet. Luckily the water damage was only to one area of one board, and not to any joists, so I took up the board and replaced it (yay for having spare loft boards lying around so I just had to cut to shape and not buy any timber), then cleaned the floor a gazillion times and laid the vinyl. I discovered that b&q’s double sided vinyl floor tape is shit, and doesn’t really stick to chipboard OR vinyl, so it may need relifting and glueing down properly at some point, but fingers crossed it’ll be ok as it is.

Here is my new pretty bathroom! I am getting a new shower in the next week or so because the motor in the old one blew up and we’ve been making do with a non-powered power shower for 6 months, which is fine for cleaning yourself, but terrible for washing my masses of thick hair. And I’m crocheting a cotton bathmat in colours to match the shower curtain.

newbathroom1

newbathroom2

Mushroom growing attempt.

So, I decided to grow mushrooms. I’ve done it before from a kit, but kits are expensive, and limited in choice. I decided to start with oyster mushrooms cos they sounded the easiest, so I bought some spawn from ebay.

spawn

The auction said you could use various substrates, but I decided on straw because it’s cheap and I happen to have a lot of it lying around for the chickens. I read all the info here and here, then got to work.

I didn’t want to venture into the cold dark garden, so I just grabbed the bag of straw that was in the garage. Only 530 grammes, when the auction said the spawn was enough to inoculate 850g of dry straw. But fuck, even 530g is a LOT of straw.

straw

I got some scissors and cut the straw into the recommended 2-4″ lengths, and shoved it in a pillowcase.

inpillowcase

I put the pillowcase of straw into a big pan then covered it with hot water. I was aiming for the normal pasteurisation of at least 70 degrees for at least 20 mins (to ensure the heat has penetrated right through the material), but my thermometer is broken so I just guessed.

inpan

While it was in the pan I disinfected the sink, then lifted the pillowcase out of the water and put it in the sink to drain and cool.

A couple of hours later, it was cooled enough, so I gloved up and layered the straw with small amounts of the spawn in food bags, and squished it tightly in. Then I realised it was going to take a lot of bags with that amount of straw, so I put the remainder into a tesco bag instead. I poked some holes in the bags and put them in the airing cupboard. I need to leave them there for a couple of weeks, then hopefully I can take them out and mushrooms will magically appear. fingers crossed!

inbag

Also in unrelated news I bought some make-up for the first time in years, partly cos i wanted sparkly eyeliner dammit, and partly cos it was £8 reduced from £30 and included mascara and eyeliner, both of which i had but really needed throwing out. And it’s pretty good, this pic was after about 4 hours of wear, and it’s still looking ok.

glittereye

In which I try to improve my baking – chocolate chip cookies

I am a pretty good cook, but I’ve never felt that confident at baking, it’s like some sort of magic, you put a load of goo into the oven and then it comes out and it’s transformed into something yummy. So I’ve been trying to bake more recently, and make up my own recipes, and generally try to understand how it works a bit better.

Last week someone posted a recipe on LSG for the most awesome chocolate chip cookies in the world, and I decided I had to make them. The problem was, the recipe was all in American, so it needed some amending. Firstly I had to work out a suitable substitute for ‘cake flour’, as that doesn’t exist in the UK, then I had to convert the cups to weight measurements, then I had to reduce the amount of butter as I refuse to use more than one pack of butter in any recipe. Then I had to make up for the fact I appear to not have any bicarb, I probably used it all for cleaning, or left it somewhere else in the house. Oh, and I added way less chocolate than asked for, mostly because I didn’t have enough, but also because holy fuck 1 1/3lbs of chocolate is a lot.

So here is my adapted recipe, which turned out reaaaaaaaaally well, and although it was an obscenely large amount of dough which turned into 25 huuuuge cookies, they still all got eaten in record time.

275g 00 grade flour
275g strong white flour
2 tablespoons cornflour
2.5 teaspoons baking powder
1.5 teaspoons sea salt
250g butter (room temperature)
2 tablespoons vegetable oil
260g granulated sugar
250g soft light brown sugar
2 large eggs
2 teaspoons vanilla extract
300g chocolatey bits (I used a bag of chocolate chips and a bag of chocolate buttons).

It is probably better that you use the recipe linked above if you want a detailed description of what to do, along with photos. This is just a short summary of what I did when I made these cookies.

1) Sift flours, baking powder and salt into a bowl and set aside
2) Using an electric mixer, cream together the butter and sugars until fully blended, then add one egg at a time while mixing. Add the vanilla and the oil. Slowly add in dry ingredients while mixing. Marvel at the vast quantity of dough produced. Realise that the mixer may well break if you abuse it any further. Wish you were rich enough to own a Kitchenaid mixer. Pour chocolate chips into bowl and work them into the dough with your hands to save the poor old mixer.
3) Cover with clingfilm (so the film actually touches the dough, no air space) and put in the fridge for 24 hours or so. If, like me, you feel that 25 monster cookies is just TOO MANY COOKIES, you can make them into circular lumps now and put them in a tray in the freezer, then when they are frozen transfer them to a bag, then you can have instant cookies whenever you want them! I actually defrosted them before baking, but there is one left lurking in the freezer for me to attempt to cook from frozen and see how it turns out.
4) Take bowl of dough out of the fridge about an hour before you want to bake, because it will be solid and need time to soften up again. Preheat oven to 180 degrees C. Make balls of dough about 2 tablespoons in volume and squish them into circular lumps about 1.5cm thick (they will flatten and widen more during cooking) and put them on foil on a baking tray. Bake for 11 minutes, or until cookies are starting to brown. After a few minutes cooling in the tray, transfer them to a wire cooling rack and try and resist eating them for as long as possible.

mmmcookies

New toy!!

I got a new toy yesterday! Looook, it’s prettttttty. And most importantly it was cheap. Yay for cheapcycle!
mitresaw

So now I will be able to cut ALL THE THINGS without whining that woodwork makes me tired and having to ask someone to help me. woooo. The only project I actually have in mind is I need to make some frames to go over the veg beds to protect the asparagus from cat digging when I plant it out, and to protect any seeds I put in the soil next year, but I’m sure I’ll think of plenty of other things I want to make. I am considering a lean-to shed type thing so I have somewhere to put the garden tools other than in the garage, but gren’s motorbike is currently living where I’d most likely put it, so I’ll need to do some thinking. So for the time being, here is the one and only thing I did with my new saw….cut some wood! Exciting eh?
cutwood

And because I was in there, I decided to take a pic of the garage. I’ve kinda almost cleared it up enough to be useable as a workshop again, another couple of hours work to sort out all the boxes and stuff, and it’ll be done. Then I can saw things and grind things and lathe things and drill things to my heart’s content. I just need to remember to put an extension lead in there so Gren doesn’t move my grinder again next time he wants to sharpen a knife.
garage

Elderberries, and other awesome stuff

So it’s the season for eeeeverything. I made blackberry jam last weekend, then this week I went blackberry picking with my parents to the woods I used to go to when I lived in the city. The blackberries were crap, so we only got a few, and decided to get a load of elderberries to make wine with instead.

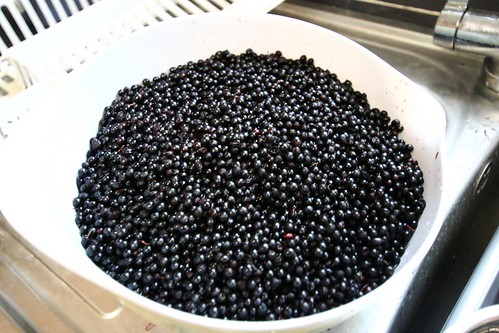
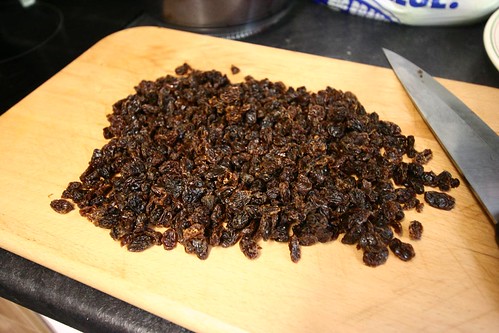
After about 2 hours of taking them off the stems and picking out all the bits of stem and unripe berries and cleaning my kitchen floor, I wanted to never see another elderberry ever again. I chucked them in a bucket with some raisins, 3 tsps citric acid, yeast, and some water.

elderberries
raisins

After a couple of days they look like this, they all float to the top and make a kinda crust, and when you pierce it with the spoon it smells sooooo good. And yes, I am aware that wine-making experts would say I should use a white bucket, but wine-making experts can fuck off. Or buy me another bucket.
elderbucket

Tomorrow or the next day I’ll squish them through some muslin into a demijohn and add the sugar.

For future reference, this is the recipe. Take 2kg of elderberries and get the stems off, squish them in a bucket, add a kettle full of boiling water and 250g chopped up raisins, 3tsps citric acid, enough cold water to make about a gallon’s worth of liquid and to bring the temp down and a sachet of high alcohol wine yeast. Stir and enjoy whenever you walk past. After 3 days or so, strain the juice, making sure to squish the pulp, and add to a demijohn with 1.5kg sugar. Ferment under airlock until it stops bubbling, then rack off and leave for a year, then bottle and leave for as long as you can bear it.

I whined about my elderberry trauma on rav, and a very kind person told me something else i can do with them which doesn’t involve taking off the stems….hedgerow jelly, woohoo!

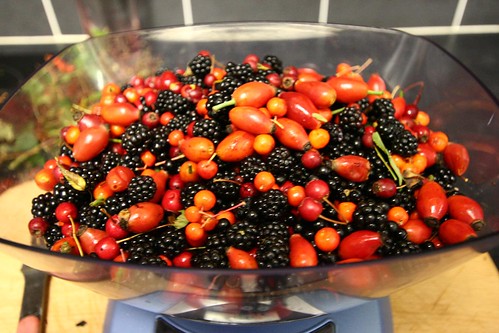
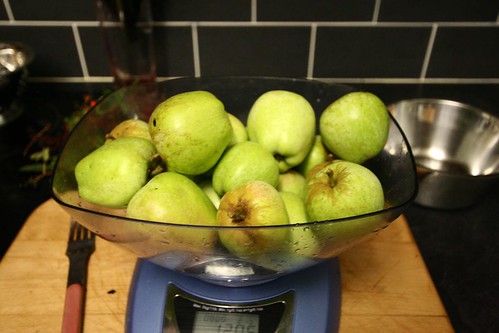
So I went and picked some stuff for it today…blackberries, elderberries, hawthorn, rowan, rosehips. I had a bag of apples already from a sneaky apple tree we found when elderberry picking earlier in the week.

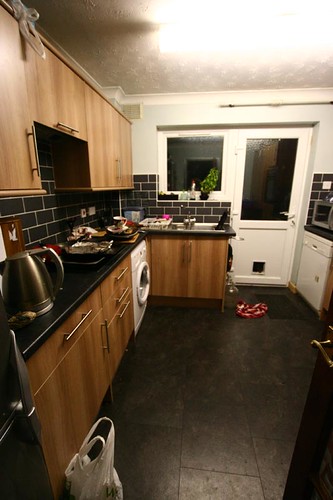
I went downstairs to find the kitchen like this:
messykitchen

It wasn’t exactly a surprise, I made sushi, chocolate brownies and cheesecake yesterday and only did about 3/4 of the washing up, and then gren cooked dinner this evening and left everything on the side because the dishwasher was full of clean stuff. I was in a sulk with the kitchen because I got an electric shock from the dishwasher this afternoon when I went to clean up. So I decided to empty the dishwasher then get the fruits in to simmer while i was doing the washing up.

hedgerowbowl
apples
hedgerowpan

I really needed to sweep the floor too, but there appeared to be a dead cat in the middle of it.
cleankitchen

On the hedgerow adventure today, we also picked a load of field mushrooms. I had grand plans to turn them into mushroom lasagne and mushroom soup base for the freezer, but it’s way too late now, so that’ll have to wait until tomorrow. Still, yum, I am looking forward to it.

mushrooms