Homemade frozen pizza

We make pizza reasonably often, and since I got my awesome stand mixer for my birthday, I’ve been making more stuff in bulk. So we decided to make a load of pizzas and attempt to freeze them so we can have them whenever we want without all the hassle of waiting for dough to rise.

We mixed:

1kg 00 flour
2 7g sachets of yeast
1 tablespoon sugar
1 tablespoon salt
4 tablespoons olive oil
650ml lukewarm water

And then let the mixer knead it for 10 minutes with a bit of a rest in the middle. We covered the bowl and stuck it in the airing cupboard for an hour or so, then J cut up toppings while I made 6 strangely shaped bases. We made 2 pizzas as normal, but the ones we planned to freeze I put in the oven at 230C without toppings for 4 minutes to partly cook, then slid out onto cooling racks to cool for a bit before topping, wrapping in cling film, and freezing. I put a handful of coarse cornmeal to spread on the trays to prevent sticking, which also makes the crust taste extra nice.

UPDATE: We have made these several times now as they are SO good. To cook from frozen, preheat the oven to 180C and cook until the top is browned, about 18 minutes. These have ruined shop bought pizza for me as they are just so much nicer.

Pizzas ready to freeze:

homemadepizza1

Pizzas we ate:

homemadepizza2

The cost was flour – £1.99 (stupid waitrose expensive organic hippy flour), yeast – 20p, salt, sugar, oil – 30p, passata – 89p, sweetcorn – 40p artichokes, olives, sundried tomatoes – £1, mushrooms – 50p, green pepper 50p, mozarella 79p (reduced, woohoo!), cheddar 50p.

So yeah, I guessed some of the costs, and we weren’t exactly trying to keep it cheap, and the total was £7.07 for 6 pizzas! So it’s £1.18 per pizza! way cheaper than frozen pizzas from the shops, and with about 3 times as much stuff on!

In other news, my dragon is growing fast!!! so cute!

growthchart10wks

Leftovers nutella cheesecake

It is a happy day in my house whenever I decide to cook with mascarpone cheese. Either I sit and eat the leftovers with a spoon out of the pot, or I get to make cheesecake. I had quite a lot of mascarpone left over from a yummy tomato and mascarpone pasta sauce I made last night, and I also had some sour cream left over from the chilli I made at the weekend, so I thought cheesecake would be a good idea to use them both up.

This is more a reminder to myself about what I did in case it’s awesome and I want to do it again than an actual recipe, but I figured I’d put it here cos someone might find it useful

Preheated oven to 200 degrees C

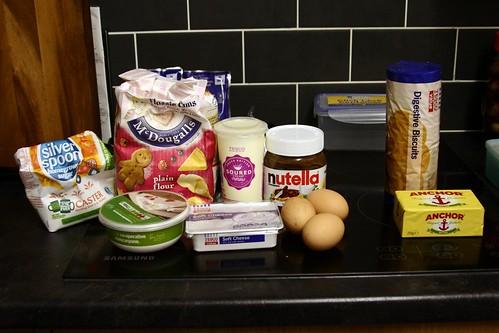
Got all these things out:
cheesecake

First I made a simple biscuit base (crushed up digestives and melted butter) and squished that down into the bottom of the tin. I ended up using a 9″ tin because the 7″ tin I intended to use looked like it would be too small for the huge amount of brown creamy goo this made, and I really didn’t fancy cleaning it off the bottom of the oven.

Then I got the mixer out and mixed up the cheese (about 3/4 pot of mascarpone and a whole tub of cream cheese) until it was smooth and creamy. Then with the mixer still running I added 3 tablespoons of flour, and the leftovers of the sour cream (150-200ml), some sugar (150g-ish) and 3 eggs. Finally I added the nutella, I used 2 huuuuge spoonfuls. After scraping down the bowl a bit and making sure it was fully mixed I poured it on top of the base and put it in the oven for as long as it took me to do the washing up and make a cheese sandwich…about 12 minutes, then turned the heat down to 90 degrees and baked until it was mostly set but still wobbled a little in the middle when the tin was shaken (about 25 mins). Now I’m leaving it in the warm oven overnight to cool, so I won’t get to eat it until the morning. boooo.

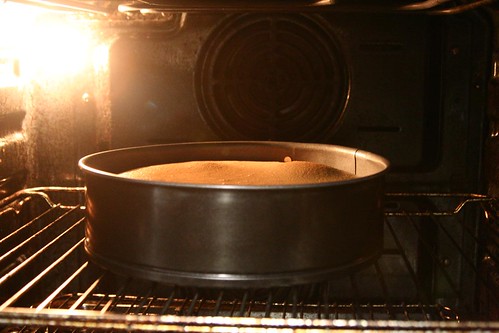
Here’s a very unglamorous picture of it in the oven, as I totally forgot to take one before I put it in. I am very glad I decided to use the bigger tin

cheesecakeinoven

In which I try to improve my baking – chocolate chip cookies

I am a pretty good cook, but I’ve never felt that confident at baking, it’s like some sort of magic, you put a load of goo into the oven and then it comes out and it’s transformed into something yummy. So I’ve been trying to bake more recently, and make up my own recipes, and generally try to understand how it works a bit better.

Last week someone posted a recipe on LSG for the most awesome chocolate chip cookies in the world, and I decided I had to make them. The problem was, the recipe was all in American, so it needed some amending. Firstly I had to work out a suitable substitute for ‘cake flour’, as that doesn’t exist in the UK, then I had to convert the cups to weight measurements, then I had to reduce the amount of butter as I refuse to use more than one pack of butter in any recipe. Then I had to make up for the fact I appear to not have any bicarb, I probably used it all for cleaning, or left it somewhere else in the house. Oh, and I added way less chocolate than asked for, mostly because I didn’t have enough, but also because holy fuck 1 1/3lbs of chocolate is a lot.

So here is my adapted recipe, which turned out reaaaaaaaaally well, and although it was an obscenely large amount of dough which turned into 25 huuuuge cookies, they still all got eaten in record time.

275g 00 grade flour
275g strong white flour
2 tablespoons cornflour
2.5 teaspoons baking powder
1.5 teaspoons sea salt
250g butter (room temperature)
2 tablespoons vegetable oil
260g granulated sugar
250g soft light brown sugar
2 large eggs
2 teaspoons vanilla extract
300g chocolatey bits (I used a bag of chocolate chips and a bag of chocolate buttons).

It is probably better that you use the recipe linked above if you want a detailed description of what to do, along with photos. This is just a short summary of what I did when I made these cookies.

1) Sift flours, baking powder and salt into a bowl and set aside
2) Using an electric mixer, cream together the butter and sugars until fully blended, then add one egg at a time while mixing. Add the vanilla and the oil. Slowly add in dry ingredients while mixing. Marvel at the vast quantity of dough produced. Realise that the mixer may well break if you abuse it any further. Wish you were rich enough to own a Kitchenaid mixer. Pour chocolate chips into bowl and work them into the dough with your hands to save the poor old mixer.
3) Cover with clingfilm (so the film actually touches the dough, no air space) and put in the fridge for 24 hours or so. If, like me, you feel that 25 monster cookies is just TOO MANY COOKIES, you can make them into circular lumps now and put them in a tray in the freezer, then when they are frozen transfer them to a bag, then you can have instant cookies whenever you want them! I actually defrosted them before baking, but there is one left lurking in the freezer for me to attempt to cook from frozen and see how it turns out.
4) Take bowl of dough out of the fridge about an hour before you want to bake, because it will be solid and need time to soften up again. Preheat oven to 180 degrees C. Make balls of dough about 2 tablespoons in volume and squish them into circular lumps about 1.5cm thick (they will flatten and widen more during cooking) and put them on foil on a baking tray. Bake for 11 minutes, or until cookies are starting to brown. After a few minutes cooling in the tray, transfer them to a wire cooling rack and try and resist eating them for as long as possible.

mmmcookies

Elderberries, and other awesome stuff

So it’s the season for eeeeverything. I made blackberry jam last weekend, then this week I went blackberry picking with my parents to the woods I used to go to when I lived in the city. The blackberries were crap, so we only got a few, and decided to get a load of elderberries to make wine with instead.

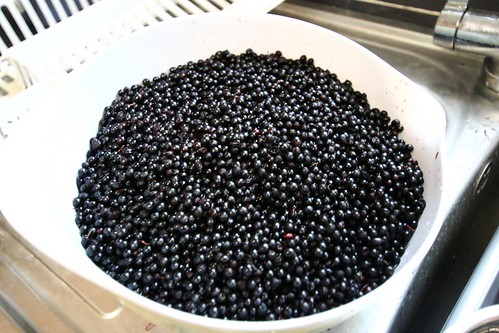
After about 2 hours of taking them off the stems and picking out all the bits of stem and unripe berries and cleaning my kitchen floor, I wanted to never see another elderberry ever again. I chucked them in a bucket with some raisins, 3 tsps citric acid, yeast, and some water.

elderberries
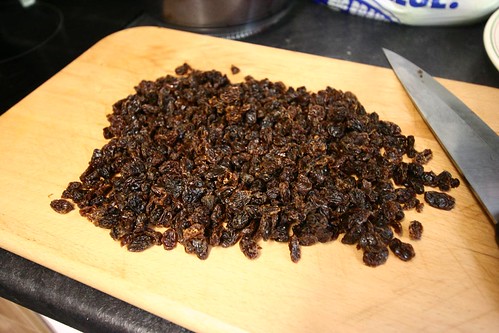
raisins

After a couple of days they look like this, they all float to the top and make a kinda crust, and when you pierce it with the spoon it smells sooooo good. And yes, I am aware that wine-making experts would say I should use a white bucket, but wine-making experts can fuck off. Or buy me another bucket.
elderbucket

Tomorrow or the next day I’ll squish them through some muslin into a demijohn and add the sugar.

For future reference, this is the recipe. Take 2kg of elderberries and get the stems off, squish them in a bucket, add a kettle full of boiling water and 250g chopped up raisins, 3tsps citric acid, enough cold water to make about a gallon’s worth of liquid and to bring the temp down and a sachet of high alcohol wine yeast. Stir and enjoy whenever you walk past. After 3 days or so, strain the juice, making sure to squish the pulp, and add to a demijohn with 1.5kg sugar. Ferment under airlock until it stops bubbling, then rack off and leave for a year, then bottle and leave for as long as you can bear it.

I whined about my elderberry trauma on rav, and a very kind person told me something else i can do with them which doesn’t involve taking off the stems….hedgerow jelly, woohoo!

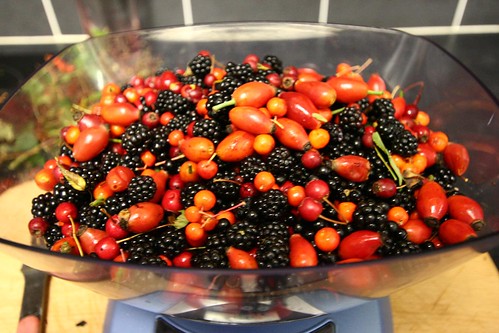
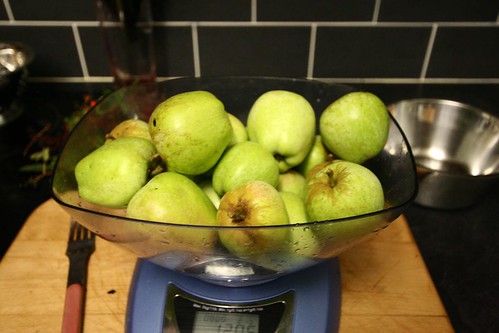
So I went and picked some stuff for it today…blackberries, elderberries, hawthorn, rowan, rosehips. I had a bag of apples already from a sneaky apple tree we found when elderberry picking earlier in the week.

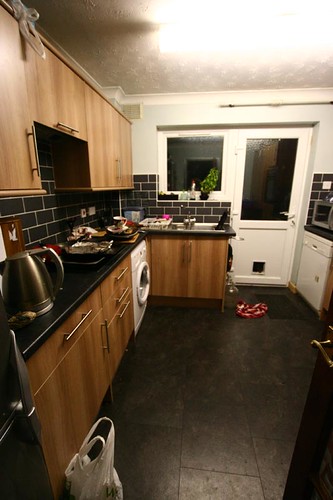
I went downstairs to find the kitchen like this:
messykitchen

It wasn’t exactly a surprise, I made sushi, chocolate brownies and cheesecake yesterday and only did about 3/4 of the washing up, and then gren cooked dinner this evening and left everything on the side because the dishwasher was full of clean stuff. I was in a sulk with the kitchen because I got an electric shock from the dishwasher this afternoon when I went to clean up. So I decided to empty the dishwasher then get the fruits in to simmer while i was doing the washing up.

hedgerowbowl
apples
hedgerowpan

I really needed to sweep the floor too, but there appeared to be a dead cat in the middle of it.
cleankitchen

On the hedgerow adventure today, we also picked a load of field mushrooms. I had grand plans to turn them into mushroom lasagne and mushroom soup base for the freezer, but it’s way too late now, so that’ll have to wait until tomorrow. Still, yum, I am looking forward to it.

mushrooms

Cider making trial run

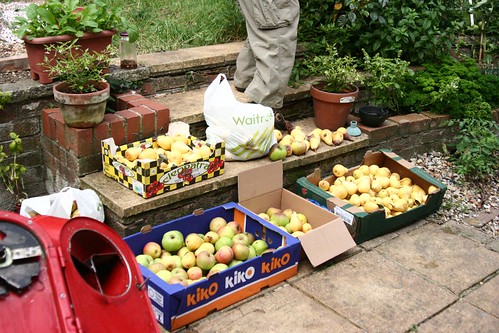
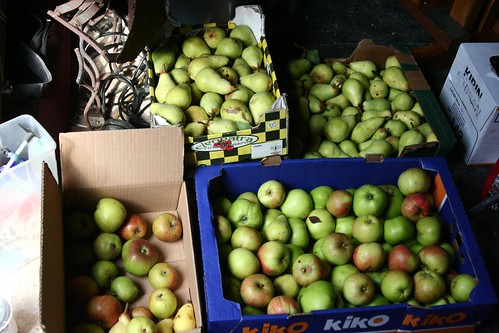
It’s not reaaaally full-on apple season yet, but I’ve had a few boxes of apples and pears sitting in my garage for a couple of weeks now, and the pears were starting to go a bit manky, so we decided to try the press out and use up what we had, and collect more apples later for another try.

fruit

We got out the apples, press, shredder, jack and demijohns, cleaned everything down with water and then with trigene to disinfect, and cleaned the demijohns with sodium metabisulphite. All ready to go!

pressready

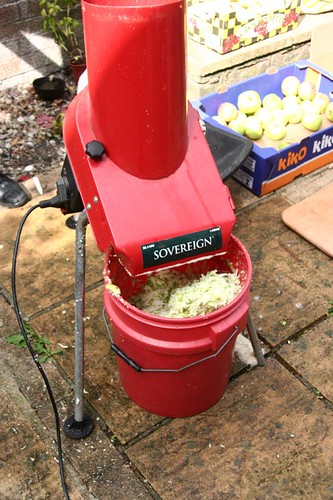
I am so glad we have the shredder, if cider-making involved hitting apples in a bucket with a big stick, I’m not sure I’d bother with it. As it is, the shredder makes light work of the apples.
shredded

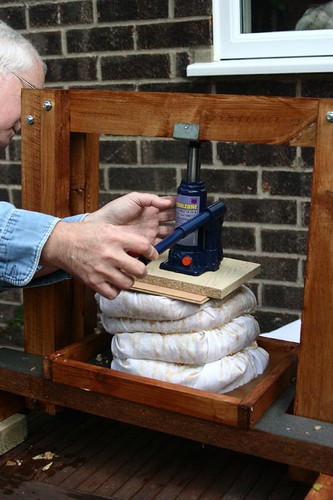
We put the apple goo into muslin parcels using a frame, and then stacked them up. It worked ok, but the pile kept sliding to one side. We did get some juice though!
firstpress

Our first juice!
firstjuice

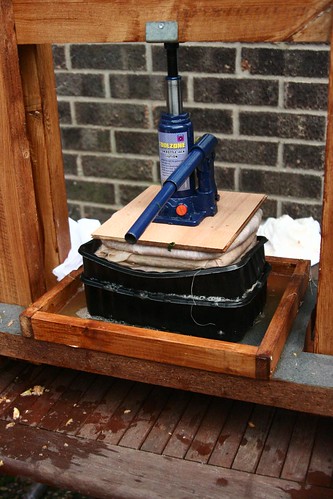
In the end we decided it just wasn’t wanting to work the way we planned, so the easiest way to fix it was to get some plastic tubs that nested inside each other, drill holes in the sides and bottom, and use these to stack the apple pulp in.
squish

This worked much better, so I’m going to look out for some metal baskets that nest inside each other, or maybe just a large metal wastebasket, and hopefully next time will be even easier.
finalsetup

We got 3.5 gallons of juice in the end. We could have had more with extra pressing, but there are so many more apples where these came from it hardly seemed worth it, and the chickens and the compost heap will enjoy the leftovers.
3.5

The first demijohn had a tablespoon of tea and a teaspoon of citric acid added, then an airlock put on, and I am hoping the natural yeasts will take care of that and make it yummy. The other 3 had the same tea and acid added, but also a campden tablet to kill anything existing in there, and I’ll add my own yeast in a day or two. The demijohn that wasn’t quite full will have blackberry juice added…at the moment the blackberries I picked a few days ago are sitting in a bowl with boiling water and some sugar. The demijohns are all sitting happily in the hallway with the mead (and yes, i really do need to vacuum the hall carpet…eek!)
finishedcider

And finally I bottled the elderberry wine that has been sitting in a demijohn for 2 years. Well, not the same demijohn, I did rack it off so it wasn’t sitting on sediment. I had a quick taste and it wasn’t unpleasant, but it was a bit harsh…hopefully a while in bottles to mellow will do the trick.
elderberry

It’s nearly autumn!

…and autumn means work…lots of work. But it’s kinda exciting fun work. I went to my parents place today to eat nommy tapas and fix my mum’s computer. After lunch we walked down the edge of the field and picked these:
blackberries

Then we walked back along the road and up through the garden and picked these! This is one type of pear, one eating apple, and one cooking apple, and there are loooads left on the trees. There’s also another pear tree and another eating apple tree with a lot of fruit on which will be ready within the next week or two.
apples

Yay for free food. I’m going to go to the woods in a week or so and hopefully get loads more blackberries, and get as many apples as I can get hold of, and then make lots of juice and cider, I’m going to try making apple and blackberry cider.

The mead is going very well, it’s bubbling super fast. Gren was so impressed with it he made a video, so I’ll upload and link that sometime. For the moment, here’s a picture.
mead

And here’s some pickled beetroot I made the other day. I don’t really like beetroot THAT much, it makes a nice addition to a salad, but it’s not one of those things I can eat with every meal, so I don’t bother growing it. I bought a bunch at the farm shop a few days ago, so I decided I’d eat some, and then pickle the rest…this jar will probably last me until beetroot time next year!
beetroot

I have lots of cooking and garden-related plans for the rest of the week, the most exciting being that I want to make these…nom nom! So I’ll make some yoghurt this evening, leave it in the airing cupboard overnight, strain it tomorrow, and hopefully be able to make cheesecakes tomorrow night. Or I might spend all day in bed and do it the next day, cos I have been pretty busy lately and I’m due a day of doing nothing to recover.

Lavender mead recipe

On sorting out my brewing kit in preparation for cider making, I discovered I had 9lbs of honey…enough for 3 gallons of mead. I went through a phase of buying it whenever it was really cheap, then forgetting about it. So I decided a couple of days ago I was going to make mead. At the front of my house are 5 lavender bushes I planted last year, and they are doing really well, and smell lovely when you walk past, and I’d been trying to think what I could do with the lavender other than dry it and hide it among my yarn, when I realised I could add it to the mead.

I have no idea whether this will taste nice, or whether it’ll be really gross, but this is what I did:

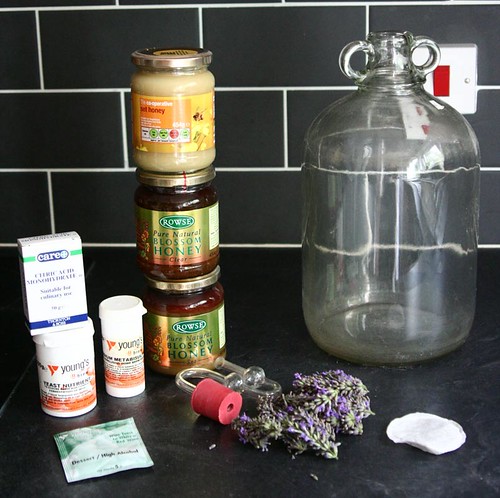
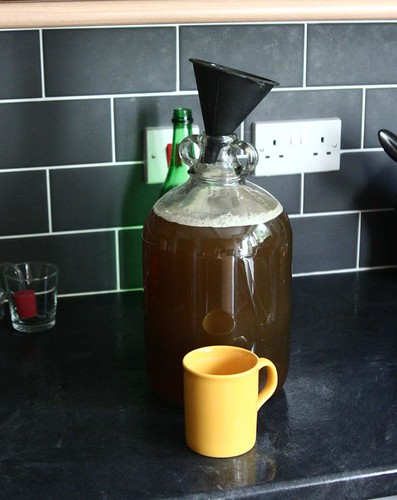
My supplies. This is what I thought I would need when I started getting everything ready: 3lbs honey, a big handful of lavender, sodium metabisulphite, yeast nutrient, high alcohol wine yeast, a demijohn and airlock, citric acid, and a teabag. I actually also needed a funnel, some muslin, a mug, a glass bowl, a large pot, and several spoons.
supplies

First I washed and sterilised the demijohn, airlock, bung, and funnel, using 1 teaspoon sodium metabisulphite in a pint of water.

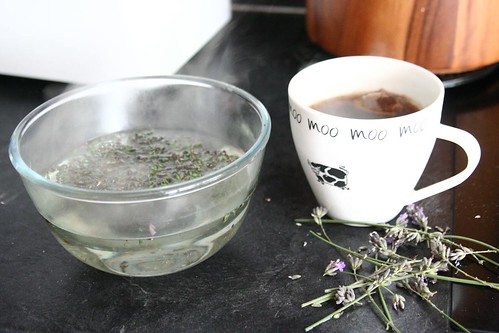
Then I stripped the flowers from the lavender and put them in a glass bowl and covered in boiling water, and put the teabag in a mug with boiling water.
brew

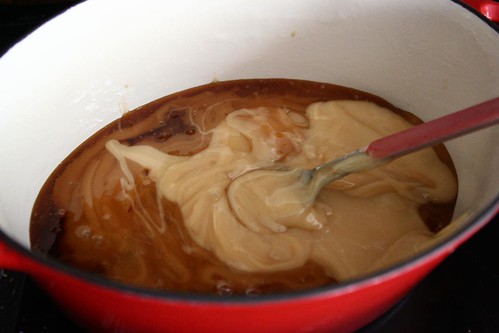
Next I put all the honey in the pan. NOM NOM NOM.
honey

I filled the empty jars with warm water and shook them to get all the remaining honey off, then tipped this water into the pan, and added a little more.
addwater

Then I turned up the heat and stirred until all the honey was dissolved, and waited until it got hot enough that a layer of scummy goo started forming on the top.
heat

I removed as much of the scum as I could and discarded it, kept heating, and repeated this until I’d had enough.
mmmm, scum.
scum

I strained the lavender water though some muslin. If you try this at home, DO NOT TASTE IT. I know it smells nice and you’re curious, but seriously, I promise, it tastes fucking gross. It tasted bad enough that I thought maybe it would be better if I just made normal mead and stopped being silly. In the end I decided to compromise and only use half a cup of the super strong lavender water. I figure if it’s not strong enough when I come to rack it off, I can always add more then.

I transferred nearly all the hot honey water to the demijohn and added the half cup of lavender water, a couple of tablespoons of the very strong tea, and a teaspoon of citric acid. I kept back a little of the honey water in a mug. I added a lot of cold water to the demijohn, hoping it would be enough to bring the temperature down to about body temperature, but it wasn’t, so I will have to leave it before adding the yeast.

I took the mug with the small amount of honey water in and topped that up with cold until it was body temp, then added half the sachet of yeast and a teaspoon of yeast nutrient.

yeastcup

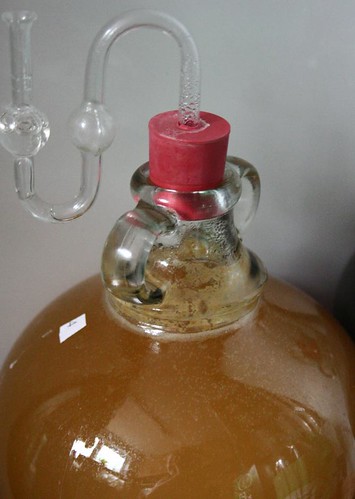
This is going to sit on the cabinet until the demijohn has cooled enough, then I’ll add it to the mix, top up with water if necessary, and stick the airlock in. And wait.

cool

And for future reference, here is a handy ingredients list:

3lbs honey (one runny, 2 set)
1/2 mug very strong lavender infusion
2 tablespoons strong tea
1 teaspoon citric acid
half sachet high alcohol wine yeast
1 teaspoon yeast nutrient

Meet Horatio the Hunchback Zombie Mouse.

Around, oh, I dunno, 8 years ago, I saw a taxidermy squirrel with wings online, and I wanted it SO BAD. But funnily enough, no-one I knew wanted to give me $300 to spend on such a hideous monstrosity, no matter how cute I thought it was. So I decided I wanted to make my own. Then I thought ‘ew guts ew ew ew’ and forgot all about it. Last year sometime my dad’s cat killed a mole, and because I have a friend who loves moles, I decided I wanted to learn taxidermy and stuff it for her, so I have had a dead mole in my freezer for a year. I did look for taxidermy courses I could go on, figuring I’d eventually get over my ‘ew guts’ reaction, but the only one i could find was £400 plus accommodation, so that wasn’t going to happen. Then, last week, I found a squirrel in a rocking chair on ebay and it was just so awesome and grotesque and cute and hilarious. And I REALLY FUCKING WANTED IT. But it was something stupid like £580. So I didn’t buy it. But I did ask google if I could learn taxidermy from the comfort of my own home with no expenditure. And it turns out, I could!

I am often gifted with dead mice/voles/shrews/birds courtesy of my cats, and because Gren has a pet snake, we always have a few in the freezer too. There were no cat killings over the last couple of days, so I got a freezer mouse instead, and set to work.

I made the body a bit too big, so he’s a little overstuffed. And I cut the leg bones off too far down so it was hard to attach the wire. And I accidentally pulled his tail off. And the fur started coming off his belly before i even had the pelt off. So he is a freakish looking hunchback tail-less zombie mouse. But it kinda worked. And I wasn’t tooooo grossed out pulling the skin off; I managed to avoid puncturing the peritoneum, so there were no guts. It did smell a bit, actually kinda like rabbit, so I’ll probably never eat rabbit again, but that’s no great loss, cos it stinks while it’s cooking and has too many damn bones in.

I named him Horatio.

horatio2

horatio1

Horatio is kind of a small mouse, so I think I will invest in some larger mice or baby rats next time we go to the snake food shop. Or maybe the cats will bring me a vole or something soon. Either way, although he is freaky and scary looking, I am reasonably happy with the fact I actually managed to do it.

Wow. I’m a hippy.

This may come as no surprise to some of you, but to me it was a bit of a shock!

A couple of weeks ago I had a shower. It wasn’t a momentous occasion in itself, I promise, I do clean myself more regularly than fortnightly. The reason this particular shower was significant is that clearly I didn’t have enough yarn projects or boobs or whatever the hell else I think about in the shower to keep me distracted, so I started thinking about what I was actually doing.

In the space of around 15 minutes, I’d used shampoo, conditioner, facial wash, shower gel, soap, leave-in conditioner, deodorant, facial moisturiser, body lotion, toothpaste and mouthwash. That’s kinda a lot of stuff, right? For someone who claims not to be a girly girl? Granted, most days involve about half the number of items…I don’t wash my hair that often cos I’m trying to avoid the grease stripping/scalp panic and makes grease cycle, and I only use body lotion when I’ve shaved my legs so my skin doesn’t get dry and itchy, but even so….that’s a lot of stuff. And I’d hazard a guess that I don’t even know what 50% of the ingredients are for.

Last week I cut my hair, from navel length to just below my boobs, just to get rid of all the split ends and really dry bits, and now I’m planning to look after it properly as I grow it. I stopped bleaching it when I started growing it, and I never use a hairdryer, but I started reading a no-poo thread on LSG, and everyone was talking about SLS and parabens and *cones and oh my! I’d tried the baking soda/apple cider vinegar thing before, and that didn’t work for me, it made my hair feel dry and stringy and gross, but the logic behind it all made sense…I don’t want to be stripping the oils from my hair with SLS, then adding condition with stuff with silicones in, which need something strong like SLS to remove. Since reducing my shampooing to about once a week last year, I’ve not really had a problem with grease build-up, but my hair does get pretty dry, and as it’s getting to winter, it’ll probably get worse. So with a heavy heart I’m going to be ditching my awesome-smelling Lush shampoo bar and conditioners full of crap, and making my own hair products.

I’ve been sporadically using an oil cleansing method to wash my face for the last year (a mix of castor and olive oils), and it does work really well, but I keep forgetting to put the facecloth back in the bathroom after I wash it, so it has been very sporadic. I’m going to try and stick to it this time though, but i’m not so sure about giving up the moisturiser…my skin doesn’t feel dry using the oil cleansing, but I like using moisturiser with SPF15 in it…I don’t want wrinkles!

But aaaanyway, the point of this huge ramble was…I made soap!! I looked around the internet for recipes, decided I wanted to make castile soap, but then decided I wanted something more foamy and easier to blend, so settled on something with coconut oil in. Then I read the quantities involved. I neither wanted nor needed 7 fucking lbs of soap, especially if it all went horribly wrong. All the sites warned against making smaller batches because you need to measure more accurately, and use a proportion of a can of lye. Well, given that most of the sites were in the states, I was going to have to measure the lye myself anyway, and I am perfectly capable of using a set of scales, so I came across this saponification chart and decided to just make it up as I went along (using the 5% discount numbers, cos I’d rather have a soap that’s a bit oily than one that could give me chemical burns!). The recipe I ended up with was (don’t copy this btw, cos I don’t know if it worked yet!):

443g olive oil, 220g soybean oil, 211g coconut oil, 291g water, 123g NaOH

I mixed the oils in a pan and put it on a low heat, then made up the lye in a big mug outside the backdoor. The second I was working with dangerous chemicals, the cats were all ‘OH HAI THERE!’, so I had to shout at them a lot, then eventually bring it inside and put it in a pan of water to cool on the countertop next to the open back door.

Then I realised my candy thermometer had got smashed in the drawer, so the temperatures I used were…oils: just above body temp, probably about 40 degrees C, lye, about the temperature of a cup of tea that had been sitting around for 10 minutes. But I didnt put my finger in that to test it, so I could be wrong!

I took the oil off the heat, poured in the lye slowly, and blended it with my bargain £4 tesco stick blender. It took less than 5 minutes until I got trace. Not actually knowing what trace was for sure, I carried on a bit until it was like thick custard, then poured into my mould, which was a loaf tin lined with clingfilm, which I then put over the top of the soap too, partly cos of OMG ASH, but mostly so i could wrap it in towels with no mess. I then put the towel wrapped bundle under a cardboard box to prevent unwanted feline attentions.

I kept peeking at it for a couple of hours, and it was soooo hot…and then it looked like it had swollen a bit, then looked a bit more transparent, and then I went to bed. The internets said to leave for 24 hours before cutting, but I am impatient, and this morning it was cold and looked solid enough, so I pulled it out of the tin and sliced it up. IT LOOKS (and smells) LIKE REAL SOAP!!!! It currently feels a littttle greasy, I’m not sure if that’s because I overdid the oils a little, or whether it’ll be okay after it’s cured.

I’m planning to leave a couple of bars as they are, then in a few days when the texture is right I’ll grate the others up, some for rebatching with essential oils, some for making shampoo, and some for trying to make my own laundry detergent.

Here are some not-so-impressive pictures.  You know, it’s soap, really, not that interesting. But there are no air bubbles or pockets of goo or anything else untoward, so yay I guess!

soap1

soap2

soap3

little bunny foo foo

I can’t sew. Imagine if a monkey were given a sewing machine. I’m not that bad. But like, if it were a genuis monkey who’d spent its life working in a sweatshop in order to feed its monkey babies..it would probably be better at sewing than me.

But but but i can knit. and i can seam knitted garments AWESOMELY. and i can do spinning and felting and dyeing and anything else related to yarn and fibre. So sometimes I forget that I CAN’T FUCKING SEW.

A couple of years ago, Nik asked me to make him a little bunny foo foo outfit for his lenore doll. I agreed, and bought the fabric and looked at it and stroked it and procrastinated, then i put it in a box. It’s Nik’s birthday soon, and he is the hardest person on the planet to buy for, as he buys every single thing he wants (and lots of things he doesn’t want), and somehow crams them into his 2 bedroom house in boxes and boxes lining the walls. I try to avoid adding to his mole-man-ness, as when he runs out of space things mysteriously appear at my house. He was getting rid of some garden stuff a few weeks ago, I asked if he had a hoe (and not JUST because the name amuses me). I am now the proud owner of 2 hoes, a spade that is different to the 2 spades i already own but i forget how, 3 garden tables, and a green trolley thing on wheels that i think is meant for planting grass seed or fertilising the lawn or some shit. So when he said he didnt know what he wanted for his birthday, and i didnt know what i could get him that would be useful, appreciated, and not mean that something else from his house had to come live with me, I decided i would make this outfit.

I can kinda sew from a pattern, but obviously there is a gap in the market when it comes to patterns for bunny outfits for dolls with vastly oversized heads. Then i had the dilemma of whether to make the costume from the comic book or the one from the animation. In the end i chose the latter cos there are better pics of it on the internet, and the comic book one would have needed a giant oversized zip that is probably not something that has been invented yet.

So over the last few days I’ve been drawing and cutting and making templates out of muslin and sewing and sticking pins into my hand and whining. I have NO idea what was going through my head when i picked the fabric. I can only assume it was ‘wow, this is cute and soft and the right colour pink and it’ll make an awesome bunny outfit and doesn’t cost a gazillion pounds a metre’. The fact that I’d have to SEW it was clearly not at the front of my mind, cos it was horrible. It’s some sort of fleecey stuff but not really fleece and it’s stretchy and really thick and i couldnt do 1/4″ seam allowances cos it all bunched up under the presser foot and wahhhhhh. Oh, and making the ears stand up and not be all floppy. NIGHTMARE.

BUT, tonight i finished it. Vampy 1, sewing 0

lenore