mmmmmmushrooms!

My mushroom growing attempt appears to have been successful. After about 48 hours in the airing cupboard, the little dots of white were larger fuzzier dots of white, and after 2 weeks all the straw was held together in a giant lump of white mushroomness.

I gave one of the smaller bags to my mum, and put the other small bag and the large bag on my windowsill, in hopes that the lower temp and bright light there would encourage fruiting. I opened the bags to allow more light and airflow. After a few days I started to worry because nothing seemed to be happening, and the top of the bags kept drying out…even though the radiators in the house aren’t on that much, it’s still fairly dry in here. So I decided to hedge my bets and try a couple of different methods. The large bag, I put in the greenhouse. It’s pretty warm in there, and pretty humid, so I figured that would help, but I wasn’t sure if it would get too cold for them at night. The small bag, I left on the windowsill, but put it in the propagator that my carnivorous plants live in, in a separate tray so it wasn’t sitting in water.

I don’t know if the moving to humid places helped, or if just waiting did the trick, but now, 9 days after taking out of the airing cupboard, I have baby mushrooms on both bags!!!

The greenhouse bag I had a look in the top, and was greeted with these:

greenhousemush2
greenhousemush1

Cute baby mushrooms! Then I carried on working in there, and noticed this huge clump growing out the side of the bag.
greenhousemush3

The indoor ones weren’t as big, but still growing in a few patches:
indoormushrooms2

I moved them to their own propagator as the box to keep them out of the water wasn’t giving them much growing space.
indoormushrooms

I’m going to take some of the straw from one of the bags and mix with fresh straw, and see if i can get EVEN MORE mushroomy goodness to grow, so I can have them constantly and not have to worry about buying more spawn. Next time I might even just start them off in the prop so i can put it in the airing cupboard and just move it out with no messing around.

The greenhouse is doing well too now it’s warming up. The radish, spinach, and mixed leaves I planted the weekend before last are coming up.

greenhousebed

And the rocket and other salad leaves we planted in the winter are really coming into their own now. We’ve eaten a few as part of the thinning out process, and I further thinned them today and put the extras into another pot.

greenhousetroughs

I love my greenhouse so much!

Mushroom growing attempt.

So, I decided to grow mushrooms. I’ve done it before from a kit, but kits are expensive, and limited in choice. I decided to start with oyster mushrooms cos they sounded the easiest, so I bought some spawn from ebay.

spawn

The auction said you could use various substrates, but I decided on straw because it’s cheap and I happen to have a lot of it lying around for the chickens. I read all the info here and here, then got to work.

I didn’t want to venture into the cold dark garden, so I just grabbed the bag of straw that was in the garage. Only 530 grammes, when the auction said the spawn was enough to inoculate 850g of dry straw. But fuck, even 530g is a LOT of straw.

straw

I got some scissors and cut the straw into the recommended 2-4″ lengths, and shoved it in a pillowcase.

inpillowcase

I put the pillowcase of straw into a big pan then covered it with hot water. I was aiming for the normal pasteurisation of at least 70 degrees for at least 20 mins (to ensure the heat has penetrated right through the material), but my thermometer is broken so I just guessed.

inpan

While it was in the pan I disinfected the sink, then lifted the pillowcase out of the water and put it in the sink to drain and cool.

A couple of hours later, it was cooled enough, so I gloved up and layered the straw with small amounts of the spawn in food bags, and squished it tightly in. Then I realised it was going to take a lot of bags with that amount of straw, so I put the remainder into a tesco bag instead. I poked some holes in the bags and put them in the airing cupboard. I need to leave them there for a couple of weeks, then hopefully I can take them out and mushrooms will magically appear. fingers crossed!

inbag

Also in unrelated news I bought some make-up for the first time in years, partly cos i wanted sparkly eyeliner dammit, and partly cos it was £8 reduced from £30 and included mascara and eyeliner, both of which i had but really needed throwing out. And it’s pretty good, this pic was after about 4 hours of wear, and it’s still looking ok.

glittereye

mmmmm timmmmmmber

I went to the woodyard today and picked up some wood for making more raised beds. I got enough for 4 large and 2 small beds, and my brain was all ‘this’ll be super quick to do with my awesome mitre saw, I should be able to get them all done this afternoon’. My body was less co-operative and decided 2 was more than enough work and that I must then immediately rest. Oh well.

So pretty!

timber

This is the bit at the side of the house that spent the last year being ignored, then weedkillered, then covered in a tarp all winter to stop more weeds. There’s enough space there for 2 large beds and a smaller one (which I didn’t make yet) between them. I just need to borrow a strong man to get the digging done. Stupid getting-tired-all-the-time body.

sideofhouse

I now need to keep an eye on it and see just how much sun it gets. I know it gets less than the main veggie patch, but the front of the house is often sunny in the morning, so I am hoping it might get more than I think. This area and the greenhouse will more than double my growing space compared to last year.

I also joined a seed of the month club. It’s soooo cheap compared to seed prices over here, it’s cheap even with international postage, and the seeds are all heirloom varieties. And I love the idea of getting random surprise seeds in the mail every month!

Winter? Are you done yet?

We’ve had a really mild winter this year, I’m not sure if it’s saving all the snow and ice and ickiness until February, or whether it’s just going to carry on being a bit rainy and windy and dreary until spring. I have my fingers crossed for the latter.

As it’s not been too horrible, we’ve been able to start on sorting out the garden a little bit…boring chores like turning compost heaps and cutting back the huge climbing rose, and general other tidying tasks. AND! moving the greenhouse!!! I love it in its new location, it’s actually on soil now so I can plant in it, and it gets the sun pretty much all day long.

gh3

gh5

I did some sawing and drilling and put a couple of beds in, but will need the assistance of awesome boyfriend to help dig in some sand and compost before it’s plantable in, though given the short work he made of digging over the plot and the trench for the base, I’m sure it’ll only take him 10 minutes or so.

I really want to plant EVERYTHING RIGHT NOW, but I’m resisting as it’s just too early for the majority of things. I contented myself with making a spreadsheet listing all the seeds we have and when they need planting and planning which heirloom varieties I want to try this year. So far I think my list is hugely tall climbing peas, some sort of climbing french beans, various tomatoes, and watermelon. Everything else will be leftovers from previous years, or from super cheap packs we got at the garden centre. I do like the idea of collecting seeds year on year and never having to buy them ever again, but I want to start off with easy stuff that isn’t hard to collect and doesn’t need hand pollinating or separating from everything else to prevent crazy inedible cross-breeds.

After entering the insane amount of seeds into my spreadsheet, I noted that there were a couple of things that were okay to plant in january, so I did! My dining room windowsill is now sporting trays of aubergines, early tomatoes for the greenhouse, onions, and various herbs. We planted autumn onion sets here and at J’s plot, so hopefully with the seeds I planted today, and more seeds planted directly into the ground in a couple of months, we’ll have a good crop of onions that lasts us all autumn and winter.

props

I also planted some sunflowers a week or so ago, we are going to have a giant sunflower growing competition, which we will both win, as we’ll end up with lots of yummy sunflower seeds to eat.

sunflowers

No rest for the wicked

Yeah yeah, so I was all ‘woo, it’s autumn, no more garden work, yay!’. And I was sooo wrong. I ordered some trees from the interwebs, and we planted them in the garden. And when I say ‘we’, I mean J did all the hard digging work and I busied myself with stuff that wasn’t too tiring. I kinda failed at the not getting tired thing, but it wasn’t toooo bad. And now I have braeburn apple, conference pear, and morello cherry trees in my garden. And a victoria plum tree in a pot that I’ll give to my dad because they are his favourite fruit ever.

This is my apple tree. Not hugely exciting, but it’s planted and looks happy and hopefully will have made me lots of fruit by this time next year.

appletree

Littlecat also had autumn garden fun by climbing my birch tree.

littlecattree

We’ve done lots of work on J’s plot in the last few weeks too…and it was very much needed. This is what it looked like after a summer of neglect.

weedyplot

After a couple of hours of strimming (him), and weed pulling (me), we’d got it looking much more like a vegetable plot and less like a patch of weeds, and also picked loads of potatoes, onions, and beetroot. 3 weeks later it was still looking much better, though some naughty weeds were trying to return.

IMG_4818

We wanted to get a head start on planting and put in as much as possible to extend the cropping season next year, so we put in onions, garlic, asparagus, peas, and broad beans. That’s pretty much all we can get in the ground now until spring, but it’s a good start. It gets dark sooo early these days, so it was hard to get a decent pic, but trust me, this area is all dug and planted and looking awesome.

IMG_4823

I just realised I’ve been very bad at blogging about fibrey things. I have still been knitting (a lot), and spinning (a little), I’ve just not got round to talking about it, but I should probably share this as I think it’s the biggest project I’ve ever done.

Sometime in the dim and distant past (march I think), I was all full of planning and enthusiasm, and decided that for my mum’s 60th I’d spin, design, and knit her a jumper. Because November is sooooo far away. So I grabbed a pile of fibre, mostly in natural colours, with a little blue for fun.

01

I carded it all up on the drum carder, which took approximately a million years. I think I did 3 passes to get it mostly-blended-but-not-too-even. Littlecat thought it was the most fun thing in the history of the world.

04

I then took each batt, split it into 4 lengthways, and rolled it up into a little bump, planning to just keep them in a box and grab them at random to further mix up the colours. When i ended up with 52 of the things, I was starting to fully realise just how long this would take. Oh well, it was March, November was soooo far away.

05

And I spun. I was good to start with and got through a lot, and wound my singles off onto a cardboard core on my ball winder so I could ply the first singles with the last and minimise any differences in spinning over the time it would take. Then at some point I forgot about spinning, as is often the case in summer.

THEN IT WAS OCTOBER ARGH.

So I brought the spinning wheel up to my room so I could spin while watching tv, and plied some of the singles, so I could spin when I had the energy, then knit in bed once I got tired. And I spun, and I knitted, and I doodled, and I found some nice contrasting handspun in my stash, and when I finally applied myself to it, I FINISHED IT.

(yes it’s a terrible pic, it was dark and the lighting was poor, but she likes it, so yay!!!)

mumjumper

It’s the end of the (gardening) year.

There were warnings of frost last week, so I brought in allll the tomatoes, and currently have 3 trays of ripening tomatoes taking up all available worktop space in my kitchen. At the start of the season I was all excited about making lots of stuff with them, and I made salsa and spicy tomato pepper ketchup. As time went on, my enthusiasm waned, and I just started sticking the ripe ones in the freezer. I now have a huge carrier bag full of frozen tomatoes to cook with. Nom.

After taking the tomatoes in, there wasn’t much left in the veggie patch, so I planted out the asparagus that’s been sitting in pots all summer, covered all the empty beds with a load of compost and stuck some fertiliser in the one I was planning to use for onions, then today I put in some onion sets and built an anti-cat frame to go over them (and got to use my new saw, yay!).

It’s not very exciting, but there are onions in here, and they won’t get dug up by cats or pulled up by birds! There’s also a huuuuge elephant garlic.

onions

The rest of the area is rather boring, though amazingly the raspberries are still going strong, I keep going out there thinking it’s nearly time to cut them back and weed around them, but every time there are more fruit.

vegpatchnov

The greenhouse has meant I can prolong the growing season somewhat though, I have romaine lettuce which are very happy in there, a couple of chilli plants I really need to get round to picking the fruit off, and a tomato that i found growing randomly in the wrong bed, which i assume came from last year’s compost…it’s flowering, though I think it’s probably too late to get it to fruit, even in the greenhouse. I also moved the pot of watercress from outside into the greenhouse, and planted some rocket, arctic king lettuce, spinach, and mixed salad leaves in the two big troughs, so I should have salady things well into winter.

greenhouse

Next year I’m planning to grow more fruit, and after ages looking around, I decided to order this..an apple, pear, cherry, and plum. I will probably get another apple tree too so they can have treesex with each other and give me more fruit, but I’m very happy with finding 4 trees for £30, and it’s just getting to the time where I can plant bare rootstock trees, and I’ve already got a big strong man to agree to help me dig the holes for them.

I have a new toy!!!!

And I love it!

I’ve been keeping an eye on ebay for greenhouses for a month or so, figuring this is probably the best time of year to get one if i want a bargain, but I kept getting outbid, so eventually I put out a ‘wanted’ on cheapcycle, and someone offered to sell me this one. Dad came with me to dismantle and collect it, then I spent a very long 7 hours putting it up the next day.

gh01

Eventually I plan to move it to the main part of the garden next to the veggie patch so I can plant tomatoes and stuff directly into the soil, but that’ll require a fair amount of work to level the area, so i decided to just put it up on the patio for the winter so I can sit in it when it’s raining, and grow a bit of lettuce and rocket. So for now it’s all set up with a table, a few pots, and a bench for me to sit on. AND I LOVE IT.

gh02

It’s nearly autumn!

…and autumn means work…lots of work. But it’s kinda exciting fun work. I went to my parents place today to eat nommy tapas and fix my mum’s computer. After lunch we walked down the edge of the field and picked these:
blackberries

Then we walked back along the road and up through the garden and picked these! This is one type of pear, one eating apple, and one cooking apple, and there are loooads left on the trees. There’s also another pear tree and another eating apple tree with a lot of fruit on which will be ready within the next week or two.
apples

Yay for free food. I’m going to go to the woods in a week or so and hopefully get loads more blackberries, and get as many apples as I can get hold of, and then make lots of juice and cider, I’m going to try making apple and blackberry cider.

The mead is going very well, it’s bubbling super fast. Gren was so impressed with it he made a video, so I’ll upload and link that sometime. For the moment, here’s a picture.
mead

And here’s some pickled beetroot I made the other day. I don’t really like beetroot THAT much, it makes a nice addition to a salad, but it’s not one of those things I can eat with every meal, so I don’t bother growing it. I bought a bunch at the farm shop a few days ago, so I decided I’d eat some, and then pickle the rest…this jar will probably last me until beetroot time next year!
beetroot

I have lots of cooking and garden-related plans for the rest of the week, the most exciting being that I want to make these…nom nom! So I’ll make some yoghurt this evening, leave it in the airing cupboard overnight, strain it tomorrow, and hopefully be able to make cheesecakes tomorrow night. Or I might spend all day in bed and do it the next day, cos I have been pretty busy lately and I’m due a day of doing nothing to recover.

Lavender mead recipe

On sorting out my brewing kit in preparation for cider making, I discovered I had 9lbs of honey…enough for 3 gallons of mead. I went through a phase of buying it whenever it was really cheap, then forgetting about it. So I decided a couple of days ago I was going to make mead. At the front of my house are 5 lavender bushes I planted last year, and they are doing really well, and smell lovely when you walk past, and I’d been trying to think what I could do with the lavender other than dry it and hide it among my yarn, when I realised I could add it to the mead.

I have no idea whether this will taste nice, or whether it’ll be really gross, but this is what I did:

My supplies. This is what I thought I would need when I started getting everything ready: 3lbs honey, a big handful of lavender, sodium metabisulphite, yeast nutrient, high alcohol wine yeast, a demijohn and airlock, citric acid, and a teabag. I actually also needed a funnel, some muslin, a mug, a glass bowl, a large pot, and several spoons.
supplies

First I washed and sterilised the demijohn, airlock, bung, and funnel, using 1 teaspoon sodium metabisulphite in a pint of water.

Then I stripped the flowers from the lavender and put them in a glass bowl and covered in boiling water, and put the teabag in a mug with boiling water.
brew

Next I put all the honey in the pan. NOM NOM NOM.
honey

I filled the empty jars with warm water and shook them to get all the remaining honey off, then tipped this water into the pan, and added a little more.
addwater

Then I turned up the heat and stirred until all the honey was dissolved, and waited until it got hot enough that a layer of scummy goo started forming on the top.
heat

I removed as much of the scum as I could and discarded it, kept heating, and repeated this until I’d had enough.
mmmm, scum.
scum

I strained the lavender water though some muslin. If you try this at home, DO NOT TASTE IT. I know it smells nice and you’re curious, but seriously, I promise, it tastes fucking gross. It tasted bad enough that I thought maybe it would be better if I just made normal mead and stopped being silly. In the end I decided to compromise and only use half a cup of the super strong lavender water. I figure if it’s not strong enough when I come to rack it off, I can always add more then.

I transferred nearly all the hot honey water to the demijohn and added the half cup of lavender water, a couple of tablespoons of the very strong tea, and a teaspoon of citric acid. I kept back a little of the honey water in a mug. I added a lot of cold water to the demijohn, hoping it would be enough to bring the temperature down to about body temperature, but it wasn’t, so I will have to leave it before adding the yeast.

I took the mug with the small amount of honey water in and topped that up with cold until it was body temp, then added half the sachet of yeast and a teaspoon of yeast nutrient.

yeastcup

This is going to sit on the cabinet until the demijohn has cooled enough, then I’ll add it to the mix, top up with water if necessary, and stick the airlock in. And wait.

cool

And for future reference, here is a handy ingredients list:

3lbs honey (one runny, 2 set)
1/2 mug very strong lavender infusion
2 tablespoons strong tea
1 teaspoon citric acid
half sachet high alcohol wine yeast
1 teaspoon yeast nutrient

How to make a cider press

If you’re looking for an actual tutorial on how to make a cider press, this probably isn’t a good place to start. If however you want to read my ranting, then hi! welcome!

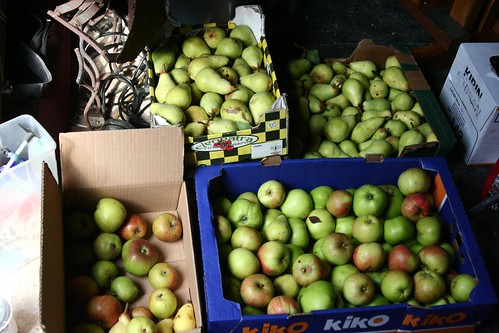
I first made cider a couple of years ago…used my garden shredder, a borrowed press, a big fermenting vessel, and lots of demijohns. I ended up with some lovely cider, and lots of vinegar (not that I’m complaining, it’s come in very useful). So this time it will be demijohn only, cos I can’t get an airlock for the huge vessel, and I am sure that is what caused the vinegarification. Well, that and forgetting to check on the fermentation regularly and then tighten up the lid when it was done. And also probably by not making enough juice and leaving a huge headspace in the vessel. It was stupidly heavy and got in the way in the kitchen anyway, demijohns are easier, and we can try different apple blends in each.

Sadly, the person who I borrowed the press from remembered that I had it, and asked for it back. We were toying of other juice pressing methods involving colanders and heavy weights, lots of wastage and lots of mess. In the end I decided to suck it up and just make my own. I decided against one with a bucket, mostly because that involves way too much precision cutting and screwing and finding suitable bits of metal. I also decided to use an old car jack rather than the huge monster screw, cos the screws are £25+, and you need the other bits of hardware to go with it too. For this press I think I spent £8 or so on timber, £7-something on coach bolts, of which I used 8 from a bag of 50, and £2.36 on silicone sealant (I have no idea why that is the only thing i remembered the exact price of).

I bought 2 lengths of 3×2 timber. Well, it would be 3×2 in the olden days, but it was actually 75mmx47mmx2400mm. I decided to get it from B&Q rather than the local (well, not so local, but cheap) wood yard, cos B&Q have a cutting service proudly announced on their website and in their shop. I took my lengths of wood to the cutting guy, and he told me ‘oh, no, we don’t cut lengths of timber, I can only cut board’, and showed me his awesome board cutting machine. Now, they sell about 20 different power saws that would do the job adequately, but apparently are unable to set one up in the shop to help me. Bastards. I mean, I know their ‘yay we are awesome we cut your timber!!!’ sign does have ‘terms and conditions apply’ in teeny tiny lettering on their website and in their shop, but I never once considered it might translate as ‘well, actually, we don’t cut your timber’. I did consider trying to kill the cutting man with my eyes, but then figured it wasn’t actually his fault, and he was a very nice man, so I saved my energy and went to pay, and had a battle with the self service checkout because I REALLY didn’t want to have to move these ridiculously long bits of wood into the bagging area to prove I wasn’t trying to steal them, or whatever the fuck their stupid reasoning behind that function is.

I maneuvered the ridiculous lengths of wood into my car, and they only needed to poke out the window a couple of inches, so it wasn’t too traumatic, and went to screwfix to embarrass myself. I was all organised with the catalogue number of the coach bolts I wanted ready, and it all went well until the cute guy at the counter asked if I wanted anything else. In my sulk at b&q i said ‘well I’d kinda like an electric mitre saw, but i don’t really neeeed one, and i can’t afford it, and i can borrow one anyway if i want to drive for 10 minutes’. So we talked about saws a bit, then he asked if i wanted anything else, and I said no, paid, and he went to get my bolts. Just as he walked away to the storeroom I was like ‘oh no wait I do want something else!!!’. I forgot I wanted silicone sealant both for the press and to fix the chicken’s water trough. So I am sure I was a very annoying customer.

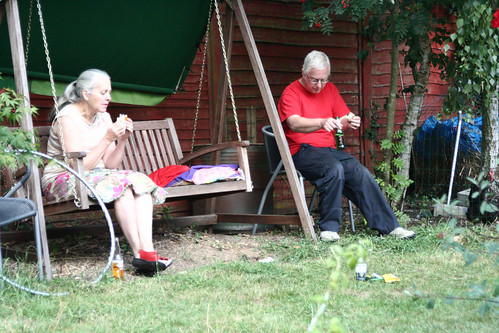
Armed with my wood and bolts and silicone, I went home and called my dad to see if I could borrow his saw and the squeezy gun thing you use with the silicone. He said yes, AND said he’d bring them over and help….score!

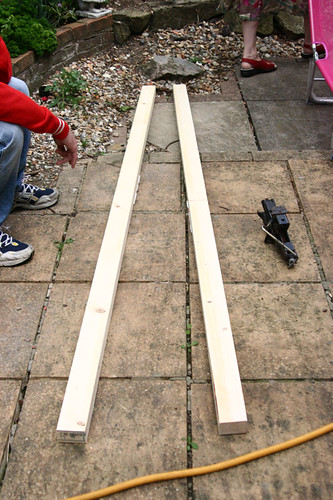
So while I was waiting I laid out my stuff.

This is a picture of some wood. I think the jack decided to sneak into the photo too. I don’t exactly know WHY I have two jacks, given that I only have one car, but having a spare is useful, because I know if I used the car one I’d forget to put it back, and then I’d get a flat the next day and then I’d be one of those annoying women who calls the RAC out because she is too incompetent to change a wheel by herself.
wood

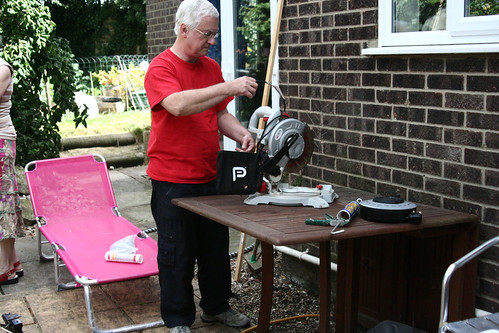
I got out lots of tools.
tools

Then my assistant arrived, woohoo!
assistant

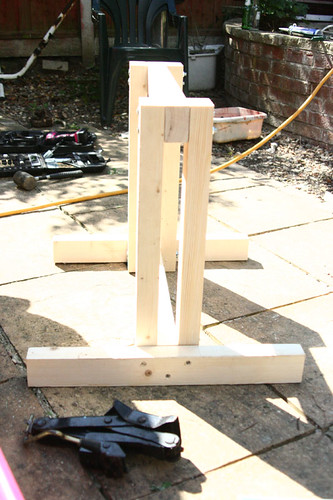
We cut each length of timber into 4 60cm lengths. Well, we cut them into 4 equal bits, because of course it didn’t actually measure what it was supposed to, but I wanted to do this the easiest way possible, so as long as they were equal, I didn’t care. If you want to make an exact copy of my cider press, make sure your pieces are 597.354mm long.
sawnwood

Then we needed to drill some holes for the bolts. The plan was to mark the first 4 sets of two holes, drill them, then use those holes to mark up for the second set, then repeat for the 3rd set. I wouldn’t even want to attempt this with a hand drill, as I’m pretty sure I’m incapable of drilling in a straight line, so we went to the garage to use the pillar drill. Then I realised i had no fucking clue where the chuck key was. The two drills I use most have keyless chucks, so it’s not something that I think about on a regular basis. After looking in all my toolboxes, shelves and drawers, I still had no idea where the chuck key was, but I decided my superhuman strength would be enough to hold the bit in place, seeing as the wood would be eeeasy to drill. And it was, and suprisingly my plan of marking and everything all worked out, and all the holes lined up and it was awesome. I did need to hit it with a rubber mallet a few times, but that was ok, and just added to the fun.

This is what we returned from the garage with.
frame

At that point I decided a well fed workforce is a happy workforce, so we stopped for sandwiches and beer, kindly made by my mum in a break from her quality control (making sure the holes went all the way through) and HR (making sure dad and I didn’t argue or mess around too much) duties.
lunch

Then I drilled some holes in the legs and screwed them on. I didn’t bother with bolts for this bit cos it would have been a pain in the ass fitting them around the other bolts, and would have probably weakened the wood with all those holes anyway. Plus the legs aren’t under much force, they just stop it falling over.
framelegs

At some point here I moved my camera to stop it getting dust in, so I forgot to take more pics for a while, but what we did was:

Located an offcut of kitchen worktop in my garage. It has been there for 12 years, but I KNEW it would come in useful at some point! Cut this so it rests on the bottom crossbeam and on the legs for extra support. Cut some bits of other wood (1×2″ maybe? I dunno, whatever, that came out of my stash in the garage too), and screwed them together into a square frame with a hole drilled into the front as low as i could get it without splitting the wood. Then we glued this frame onto the bit of worktop, and shoved a bit of syphon tubing into the hole.

And that brings us to the almost-finished product.
finished

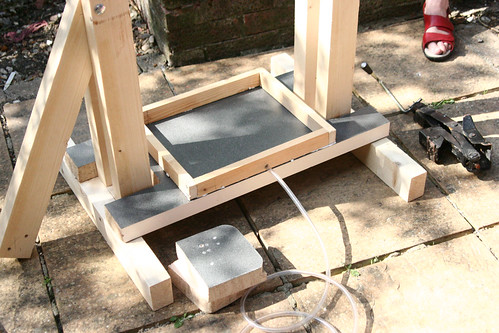
Now all it needs is a coat of varnish on the bare wood parts, and some sealer around the worktop/rim join. Then I need to grab a couple of bits of waste wood/worktop to use between the jack and the frame/apples to get even pressure, and it’ll all be in working order!